In the modern digital landscape, managing who has access to what creates a massive administrative burden. Whether onboarding new employees, managing vendor access, or securing project data, manual provisioning is slow and error-prone.
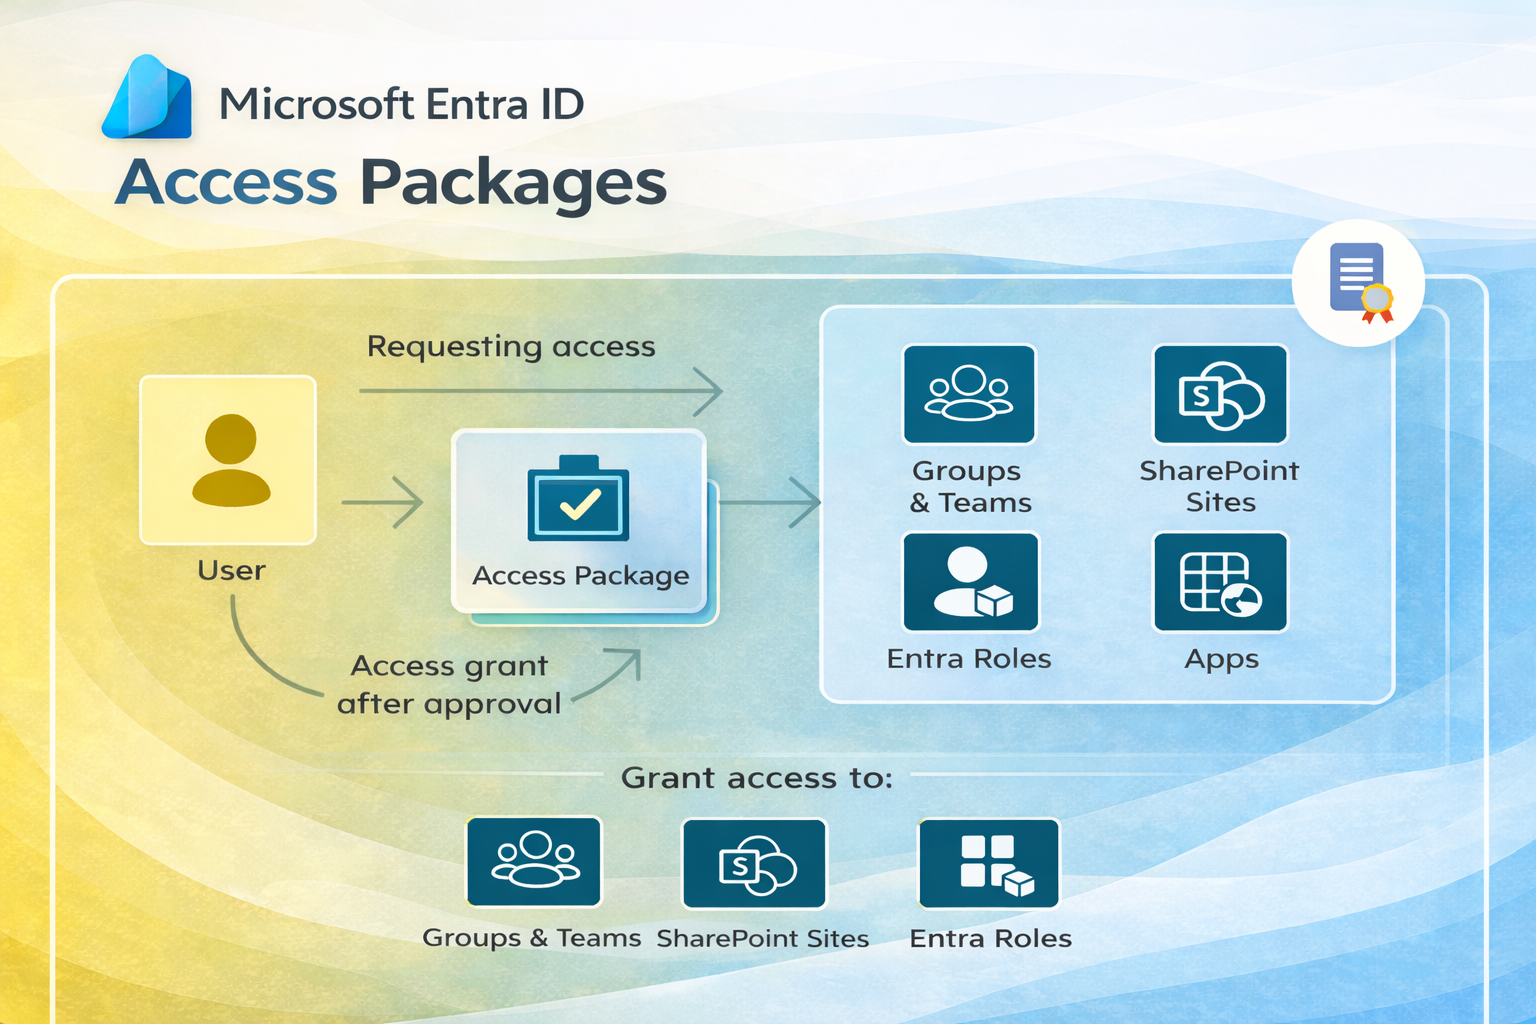
Enter Microsoft Entra ID Governance (formerly Azure AD Identity Governance). One of its most powerful features is the Access Package. This tool allows IT administrators to bundle resources—like groups, applications, and SharePoint sites—into a single package that users can request.
In this guide, we’ll walk you through the step-by-step process of creating an Access Package to automate your identity lifecycle management.
What is an Access Package?
An Access Package is a bundle of all the resources a user needs to work on a project or perform their role. Instead of assigning a user to a security group, then an application, and then a SharePoint site individually, you bundle them all together.
- Catalog: A container for resources and access packages.
- Policy: Rules that dictate who can request access, who approves it, and when access expires.
Prerequisites
Before you start, ensure you have the necessary permissions. You need to be signed in as one of the following:
- Identity Governance Administrator
- Catalog Owner
- Access Package Manager
Step-by-Step: Creating Your First Access Package
Step 1: Initialize the Process
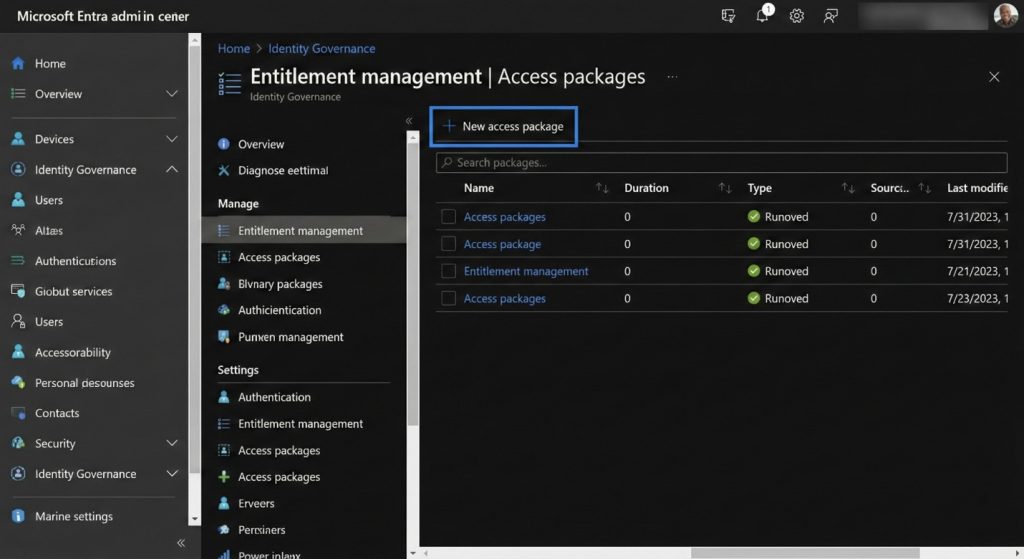
- Sign in to the Microsoft Entra admin center.
- Navigate to ID Governance > Entitlement management > Access package.
- Click on New access package.
Step 2: Configure the Basics
On the Basics tab, you define the identity of your package.
- Name & Description: Give it a clear name (e.g., “Marketing Team Onboarding”) and a description. Users will see this when they request access.
- Catalog: Choose where this package lives. If you don’t have a specific catalog (like “HR” or “Finance”), the General catalog is used by default.
Step 3: Select Resource Roles
This is where you define what access the users get. You can add:
- Groups and Teams (Security groups, Microsoft 365 Groups)
- Applications (Enterprise applications, SaaS apps)
- SharePoint Sites (Online sites)
For each resource, you must select a specific Role (e.g., “Member” or “Owner”). This ensures users get the exact level of permission they need—no more, no less. The image below shows the process of adding a group and assigning a “Member” role to it.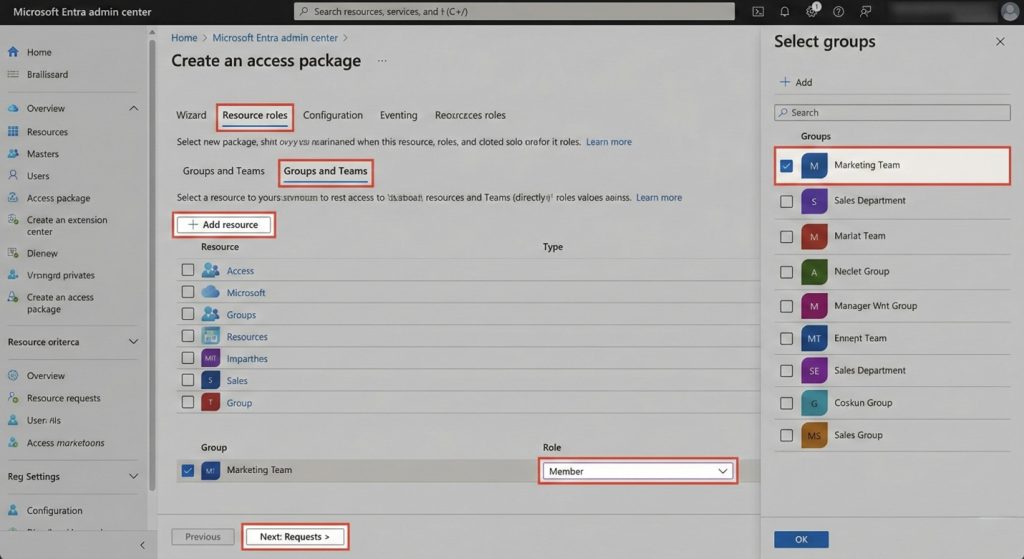
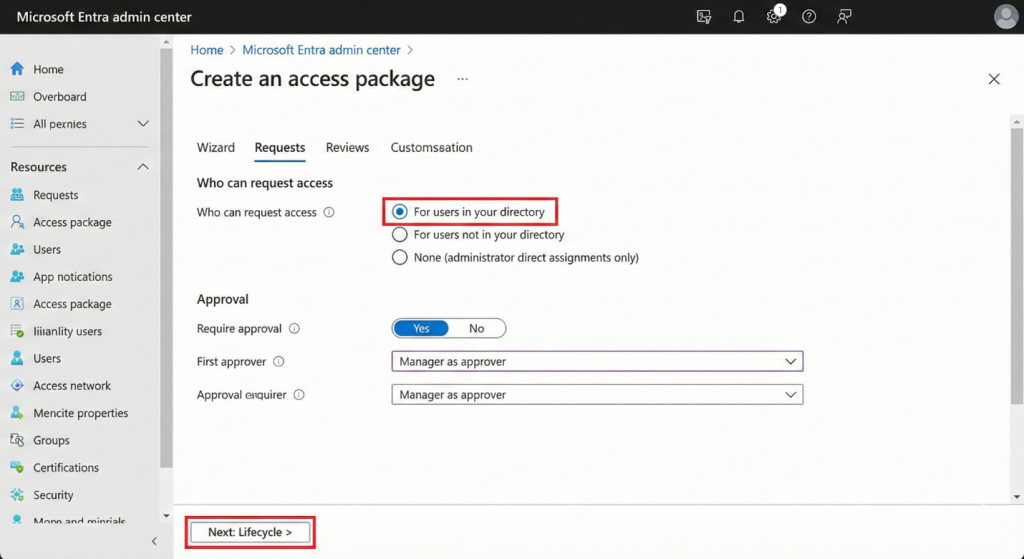
Step 4: Define Requests and Policies
The Requests tab is the brain of the Access Package. Here you determine who can request access. You can configure policies for:
- Users in your directory: Great for internal departmental access.
- Users not in your directory: Use this for B2B collaboration with partners.
- Administrator direct assignments only: Choose this if you don’t want self-service requests.
You can also set up Approval Settings (e.g., require manager approval) and Lifecycle Management (e.g., set access to expire after 90 days). The image below shows the configuration for allowing users in your directory to request access, with manager approval required.
Why Use Access Packages?
- Automation: Users request their own access; approval flows run automatically.
- Security: Access expires automatically, preventing “access creep.”
- Efficiency: Onboard employees to 10+ apps and sites with a single click.
Conclusion
Creating an Access Package in Microsoft Entra ID is a “set it and forget it” way to secure your organization’s resources. By bundling permissions and wrapping them in strict policies, you empower users to be productive while keeping your data safe.
Ready to clean up your access management? Log in to Entra and build your first package today!